How to run remote ideation workshops
An ideation workshop with your team in the office is a good way for great ideas to be born. Running them in the luxury of a cosy breakout space with whiteboards, a giant box of post-it notes, sharpies with all the colour of the rainbow and a pile of A3 paper — is probably already in your UX playbook. But what if a deadly pandemic takes over the world and you’re all stuck at working from home?
Overview
Not long ago, our team reached a point where planning the next iteration of our product became imminent. We were deep into the COVID-19 lockdown and were all working from home, but had to start ideating together, which none of us had done remotely before… but we did it anyway! 💪
What we found was that after making necessary adjustments and preparations to run these workshops remotely, they went down very well. We got into a similar flow and collaboration was filled with a lot of fun, creativity and became a true bonding experience for the team. It also helped us to break away from the monotony of lockdown and every day remote work.

Here’s the process we went through and a list of things we used:
Main steps:
- Start with user needs
- Have a user needs workshop (optional)
- Run an ideation session
- Follow up ideation sessions (optional)
- Catalogue ideas
- Prioritise and plan iterations
What you’ll need:
- Time allocated for the whole team
- Research findings/data about your users
- Miro board with team access
- Pen and paper
- Mobile phones with Slack app
- Private Slack channel
Start with user needs
Gather recent research findings, data and analysis you can find about your users and the product you’re working on. Aim to have 2–5 different sources of truth that gives you a good understanding of the main customer problems and needs.
We used customer feedback from research sessions and Usabilla, a deep-dive performance analysis of our service from the data science team and a report with business analysis findings investigating calls and complaints in Customer Service.
User needs workshop
I believe that better understanding leads to better outcomes, so instead of simply kicking off with a ‘How might we…’ question, we started with a session where we looked at research findings and worked with user needs as a team. I invited everyone in our team to take part, including our developers, product manager, data scientist and user researcher. This helped us to get everyone on the same page and have a common understanding of our users and their problems.
Here’s how to run a simple remote user need workshop:
Preparation
Create a Miro board with a column for ‘What do we know?’ and one for ‘What does it mean?’ Create groups with snapshots of research findings in the ‘What do we know’ column. (See photo)

Workshop
Talk your team through a group of findings in the ‘What do we know?’ column, then spend 5–15 mins to write down user needs and problem statements in the ‘What does it mean’ column. Repeat for each group.
Some people enjoy identifying user needs while some people find it easier to think about problems, so it’s better to keep it loose and let participants follow their preference. Both needs and problems are important and usually come in pairs anyway.
Wrap up
Group the post-it notes into themes. (You can do this by yourself after the session to save time.)
Prepare for the ideation session
Book in 60–90 mins
Invite 4–8 people and add details to the invite, including what they need to bring: pen and paper, mobile phones with Slack app. If your team doesn’t use Slack — then simply use email. (Any paper will do, some of us used the back side of paper bills or envelopes :)
Prepare Miro board
Using the post-it notes from the user needs workshop, build a new section on your board for the main themes, then going through the problem statements and user needs come up with 3–5 ‘How might we..? ’ questions for each category.
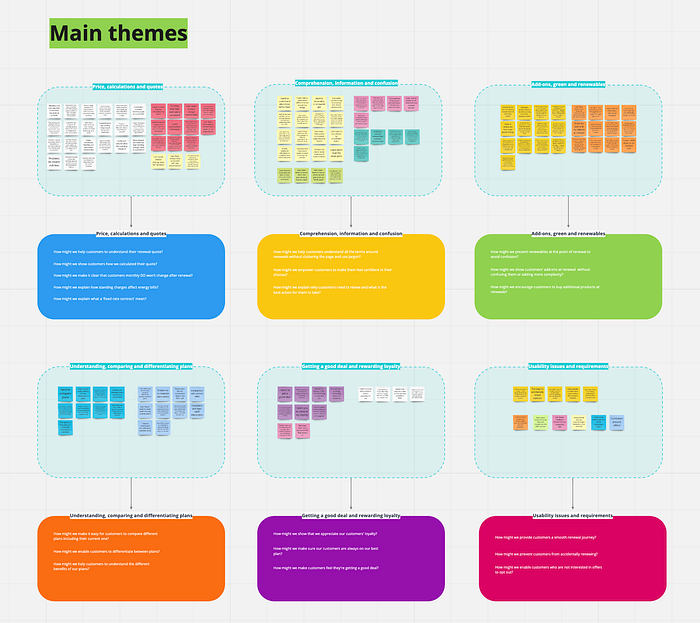
This board will help your team to have an overview of the needs and problems you need to address and the opportunities they offer. You can also come back to this board anytime in the future for inspiration or to validate new ideas.
For the ideation session I recommend to come up with only one HMW question that is broad enough to cover most of these problem areas as a blanket. It will help your team to be creative without zooming in too much on specific problems or getting confused because of the variety of choices.
Running the ideation session
Part 1
Warm up
On the big day, check if everyone has pen and paper first, then go through the board you prepared on Miro and talk your team through the main themes of the user needs workshop and the ‘How might we questions’ for each group, so everyone has an overview of the main problems you identified.
Do a round of Crazy 8s
Explain what Crazy 8s are. I chose to do “Crazy 6s” because participants only had A4 paper at home and there wasn’t really enough space for 8 ideas.
Use the generic HMW question for this exercise, and set Miro’s timer to 1 minute for each idea and repeat it six times. (I prefer using short timers, so we did → 6x1 minute spending 1 minute on each drawing rather than 1x6 minutes for all six. It helps not to overthink ideas and jog creativity).
Share and talk through ideas
Ask everyone to take a photo of the sketch they made and upload it to Slack. Download them to your computer then open them one by one on full screen while screensharing and ask the author to talk through their ideas. Other participants can comment afterwards. (Only positive feedback, no critique.)
Have a short break (5 mins)

Part 2
Do a round of sketching
Take 10 mins to do a round of sketching, but this time, it’s only 1 sketch where people can combine their favourite ideas on a higher fidelity drawing. They can use both their own and other people’s ideas. (It’s ok, it’s co-creating and not stealing! ;)
Share and talk through ideas
The same way as you did after the first round. Then wrap up and agree on next steps with your team mates.
Honestly, we had so much fun in this workshop! Some of us had never done a sketching exercise before and started off very shy. Some of us got a bit nervous during the Crazy 8s because of the short timer. But with some encouragement, a little humour and making everyone feel safe, we all got a taste for it and felt like it really helped us break away from our every day work routine.
Follow up ideation sessions
You might have enough ideas after one session to stop and move onto designing the next iteration of your product, or you might need additional sessions — there are no hard rules here, so focus on what’s best for your team.
Our team enjoyed our first session and felt so inspired that we did several more rounds. (We did 4 sketching sessions overall.)
Useful tip: If you ever get stuck on a session and ideas are not coming then simply stop and do a round of Crazy 8s — it will help to unblock creativity and save you from overthinking.
Some ideas for follow up sessions:
- You can just simply sketch together
- You can focus on different problems
- You can go deeper/more granular
- Or you can take it to the next level and go high fidelity
After your session(s)
Collect all sketches
And put them on your Miro board after each round. Capture the author’s name, so you don’t forget whose idea it was.
Mock up favourite ideas
Try to mock up the favourite ideas between sessions on Figma (or similar). It will help you to understand if it needs more thought, plus, not everything will turn out great on digital.
Describe ideas on post-it notes
Capture the essence of each idea on a post-it note, so it’s easier to catalogue them.
Organise ideas
Group ideas together and match them with the user need/problem they intended to solve, so you’ll always know where it came from and why you did it when looking back.
Finish with prioritising and planning your iterations
As a last step, we went through all the ideas together and discussed next steps.
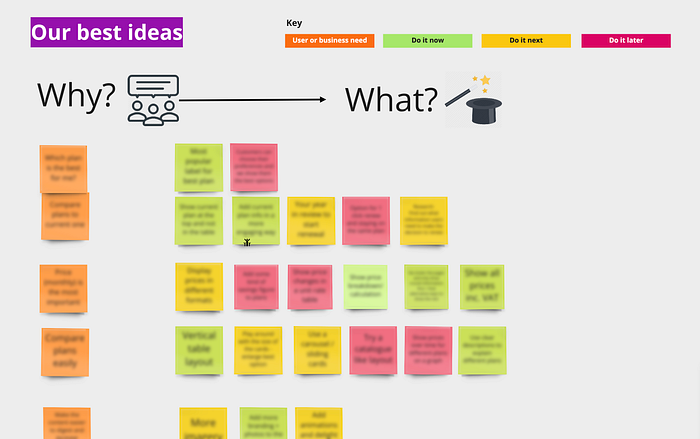
What we did:
- Discussed all ideas
- Prioritised them based on value and effort
- Colour coded them to reflect 3 categories: ‘Do it now’, ‘Do it next’ and ‘Do it later’
Our next design iteration was based on ideas labelled as ‘Do it now’.
Results
Our team was really happy with the new visual designs I created based on our ideas. Everyone in our team felt like it was their own and we were all truly proud of our work. The process we went through also made me feel very inspired and motivated me to do my best design work (ever).
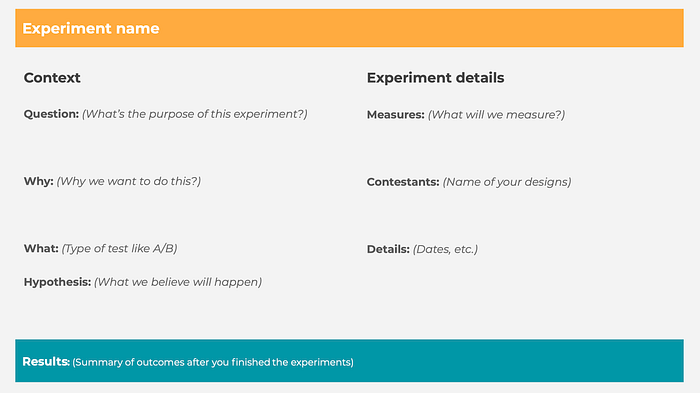
We ran a round of moderated testing on the new designs with customers and it was very well received. We then set up an A/B test splitting the traffic by 50%-50% for the new version and the existing version of our product. We also filled out an experiment card to agree on what we wanted to measure and what success looked like.
After 2 weeks, we reached statistical significance with flying numbers for the new version. We achieved a whopping +7.7% relative uplift in conversion rates, which translates to over a £1million extra in revenue a year for our company! 🥳
Special thanks to my wonderful team who fully supported me and was always on board during this process, and to my fantastic colleagues in the UX team who expressed interest in our work and inspired me to write this article. 💚